
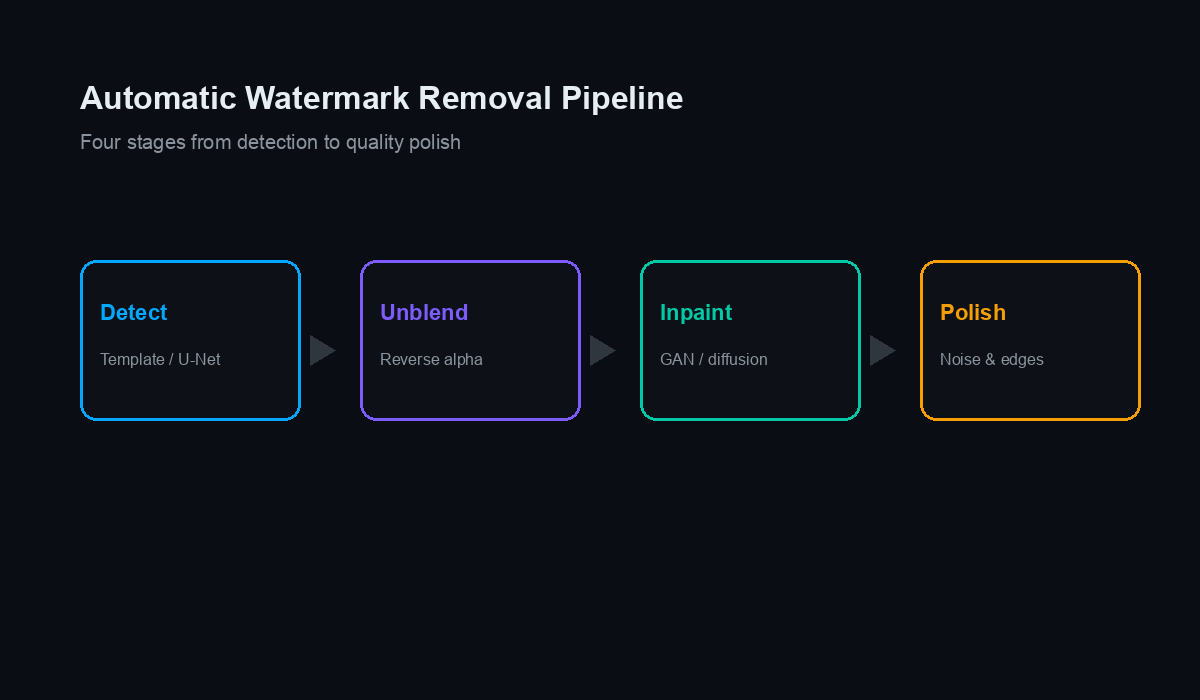
Removing a visible watermark cleanly is one of the harder problems in image processing, because the software has to do two things at once: locate the overlay precisely, and reconstruct whatever was hidden beneath it. Modern tools solve this with a multi-stage computer-vision pipeline rather than a single trick. This article walks through that pipeline as it applies to tidying up your own AI-generated images.
One clarification first: everything below concerns visible marks — logos, badges, and semi-transparent overlays that you can see. Invisible provenance signals such as Google's SynthID are embedded in the image data itself and are a completely separate system; the algorithms here neither target nor detect them.
Stage 1: Detection
Before anything can be removed, the software must find the mark. There are two broad approaches, and good tools blend them.
Classical computer vision
When the watermark is a known, fixed logo — like a specific tool's corner badge — classical methods are fast and reliable. Template matching slides a reference image across the frame and reports where correlation peaks. Edge detectors such as Sobel or Canny highlight the sharp, geometric boundaries typical of a logo, and thresholding on brightness or color can isolate a semi-transparent white mark against a darker background. These techniques need no training data and run in milliseconds.
Learned segmentation
For marks that vary in size, position, or opacity, a segmentation network — commonly a U-Net style architecture — is more robust. Trained on many examples of a watermark over different backgrounds, it outputs a per-pixel probability that each pixel belongs to the overlay. The result is a mask: a grayscale map where bright areas mark the watermark and dark areas mark the untouched image. A good mask is the single most important factor in a clean result, because every later stage operates only inside it and leaves the rest of your image untouched.
Stage 2: Reverse Alpha Blending
Most tool overlays are not opaque; they are blended on top of the picture with some transparency. That blend follows a simple formula. If the watermark color is W, the original pixel is O, and the overlay's opacity is α, then the pixel you actually see is:
observed = α · W + (1 − α) · O
When the mark's color and opacity are known or can be estimated, that equation can be rearranged to solve for the original pixel:
O = (observed − α · W) / (1 − α)
This is "reverse alpha blending," and where it applies it is the cleanest possible repair — it recovers the true underlying pixels through arithmetic rather than guesswork. It works beautifully for consistent, semi-transparent marks, which is why a faint overlay often disappears with no visible trace. Its limit is opacity: as α approaches 1, the term (1 − α) shrinks toward zero, the division amplifies noise, and too little of the original signal remains to recover.
Stage 3: Inpainting the Opaque Areas
Wherever the overlay is fully opaque, the original pixels are gone and must be reconstructed rather than recovered. This is inpainting, and it has evolved through three broad generations:
- Patch and diffusion-based fills: older methods copy plausible texture from surrounding regions. They are fast and excellent for uniform areas like sky or blurred backgrounds, but struggle across structured edges.
- GAN inpainting: a generative adversarial network predicts new content that a discriminator judges for realism. This handles moderate structure — continuing a horizon line or a wall — far better than copy-based fills.
- Diffusion-model inpainting: the current state of the art iteratively denoises the masked region conditioned on its surroundings, "imagining" texture that is semantically consistent. Over skin it reconstructs pores; over a field it grows new blades of grass.
Because the model invents detail rather than uncovering it, an inpainted region is a plausible reconstruction, not the literal original — which is exactly why a precise mask that keeps the repaired area as small as possible matters so much.
Stage 4: Blending and Post-Processing
A frequent giveaway of a cheap tool is a patch that looks too clean — a smooth, waxy spot where the grain of the photo suddenly vanishes. Quality pipelines add a finishing pass to make the edit disappear:
- Noise matching: real images carry a fine layer of sensor or generation noise. The tool measures the grain of the surrounding pixels and re-injects a matching pattern into the repair so it does not look artificially smooth.
- Color and luminance harmonization: the fill is nudged to match local brightness and white balance so no faint rectangle is left behind.
- Edge feathering: the mask border is softened by a pixel or two so the boundary between original and repair is imperceptible.
Why It Runs Well in the Browser
Each of these stages is ultimately pixel math, which is exactly what modern browsers accelerate. Detection and blending run efficiently on the CPU, while the heavier inpainting step can be offloaded to the GPU. That is what lets a tool like our watermark remover perform the full pipeline locally, so your images stay on your device. If your goal is protecting the underlying detail during editing, our guide to preserving image quality pairs well with this one.
Conclusion
Automatic removal has moved a long way from the manual clone stamp. Detection finds the mark, reverse alpha blending recovers what it can mathematically, inpainting reconstructs the rest, and a careful finishing pass hides the seams. Understanding these stages sets realistic expectations — faint overlays vanish completely, while large opaque logos are convincingly reconstructed rather than perfectly restored — and helps you get the best results when cleaning up your own AI art.